


No results found. Try again with different words?
Search must be at least 3 characters.
- How to deliver a lead magnet through your confirmation page or thank you page? – Using Double Opt-in
- How to Create a Full screen popup in Convert Pro?
- How to Disable Call-to-actions for Subscribers?
- Introducing the Honeypot field in Convert Pro
- Disable cookies using Cookiebot plugin with Convert Pro for GDPR regulations
- How to create Multilingual call-to-action with WPML
- How to Display a YouTube Video in a Convert Pro Call-to-Action?
- Convert Pro Supports GDPR Regulations
- How to auto close call-to-action in Convert Pro
- How to Translate Convert Pro Plugin in Your Own Language using GlotPress?
- How to Create a Full screen popup in Convert Pro?
- How to Reposition an Infobar in Convert Pro?
- How to Reposition a Slide-in in Convert Pro?
- How to Fetch the Latest Templates on my Website?
- How to Create a Multi-step Call-to-action in Convert Pro?
- Advanced Settings in Convert Pro
- What is a Call-to-Action in Convert Pro? How can I create one?
- How to Create a Call-to-action as a Widget Box using Convert Pro?
- How to Create an In-Content Call-to-action in Convert Pro?
- How to Create a Before/After Post Inline Call-to-action in Convert Pro?
- How to Create a Slide-in Popup in Convert Pro?
- What are the minimum requirements to use Convert Pro?
- Schedule Your Call-to-action in Convert Pro
- How to Target Users based on the Device they use?
- How to Display a Call-to-action on a Specific Page, Post, Category etc (Page Level Targeting)?
- Configuration Settings for a Modal Popup in Convert Pro
- How to Create a Modal Popup in Convert Pro?
- Understanding the Email Notification Settings in Convert Pro
- Understanding the General Settings of Convert Pro
- How to Install Convert Pro Addons?
- How to Trigger Convert Pro Popup based on Page Visits?
- How to Show a Call-to-action to Users who have Subscribed through Particular Call-to-action?
- How to Show or Hide a Call-to-action only after a User has seen a specific Call-to-action in Convert Pro?
- How to Trigger a Popup when a particular Cookie is set?
- How Can I Create an Ad Block Detection Popup with Convert Pro?
- Schedule Your Call-to-action in Convert Pro
- Trigger a call-to-action when a Class or ID appear in Viewport
- How to Trigger a Call-to-action after few seconds?
- How to Trigger a Call-to-Action after a Blog Post?
- Troubleshooting Guide: Google Analytics Integration
- How to Setup Convert Pro custom Events in Google Analytics 4 property
- Authorize Convert Pro to view Google Analytics 4 data
- Display Call-to-Action Inside the Post/Page Content
- How to Add Dynamic Tag Support for the Autoresponder?
- How to Enable Form Field Validation?
- How to Change the Slug of Popup? – Convert Pro
- What is MX Record Validation For Email in advanced settings?
- Adding the Google reCaptcha form field in Convert Pro
- How to Set Cookie Name When a Particular Call-to-action is Submitted or Closed?
- How to deliver a lead magnet through your confirmation page or thank you page? – Using Double Opt-in
- How to Show or Hide a Call-to-action only after a User has seen a specific Call-to-action in Convert Pro?
- Where can I find the ID (style ID) of the call-to-action in Convert Pro?
- How to Trigger a Popup when a particular Cookie is set?
- Convert Pro Supports GDPR Regulations
- How to Disable Google Fonts in the Frontend?
- How to Track Users Depending on their Location or Country? (Geo Location or GeoIP Tracking)
- How to Offer Downloadable Files or Lead Magnets after Successful Form Submission?
- Convert Pro Email Notification Filters
- Filter to Add a New Custom Font
- How to Target Users based on the Device they use?
- How to Disable Google Fonts in the Frontend?
- How can I disable a Call-to-action on Mobile Devices?
- Show or Hide Call-to-action to Logged in and First time users
- Working with Referrer Detection in Convert Pro
- How to Display a Call-to-action when a Specific Product is Added to the Cart?
- Troubleshooting Guide: Google Analytics Integration
- How to Setup Convert Pro custom Events in Google Analytics 4 property
- Authorize Convert Pro to view Google Analytics 4 data
- How to Integrate Convert Pro with FluentCRM?
- How to Integrate Convert Pro with SendFox?
- How to Integrate MaxMind Geolocation in Convert Pro?
- How to Integrate Convert Pro with MailWizz?
- How to Integrate Convert Pro with Moosend?
- How to Integrate Convert Pro with SendGrid?
- Filter to Add a New Custom Font
- How to Pass Current Page URL as a Value to Hidden Field of the Form?
- How to White Label Convert Pro?
- How to Create a Language Specific Popup in Convert Pro?
- How to Clear Cache for Call-to-Actions in Convert Pro?
- How to Use the Advanced Script Addon in Convert Pro?
- How to Trigger a Call-to-action only on Woo-commerce order received page?
- How to Display a Call-to-action when a Specific Product is Added to the Cart?
- How to Add Custom Conditions to Display a Call-to-action?
- How to Add a New Google Font?
- How to Change the Credit Link Text?
How To Automatically Submit a Hidden Form on Thank You page after Submission of One Form? (Get Parameters)
Have you ever thought of implementing an application like this –
- Accept user’s name and email address through one call-to-action
- Redirect user to another page (Thank you page with another button with a new offer)
- When the user clicks on this button, the user’s name and email submitted earlier is fetched and submitted through this button too.
This is certainly possible using Convert Pro settings along with some JS code.
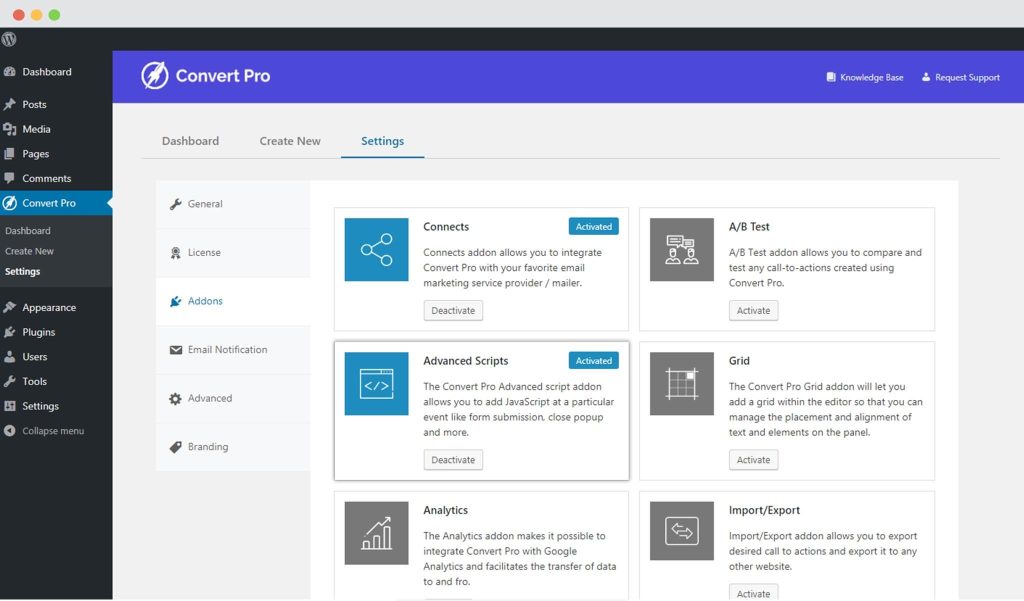
Now, since we need to add JS code, it is important that we activate the Advanced Scripts addon. You’ll find this addon under Convert Pro Settings -> Addon -> Activate the Advanced Script addon as shown in the screenshot.
Let us now proceed creating the required call-to-actions and setting them up.
1. Create a call-to-action and add the required fields in it. (We will add an email and name field)
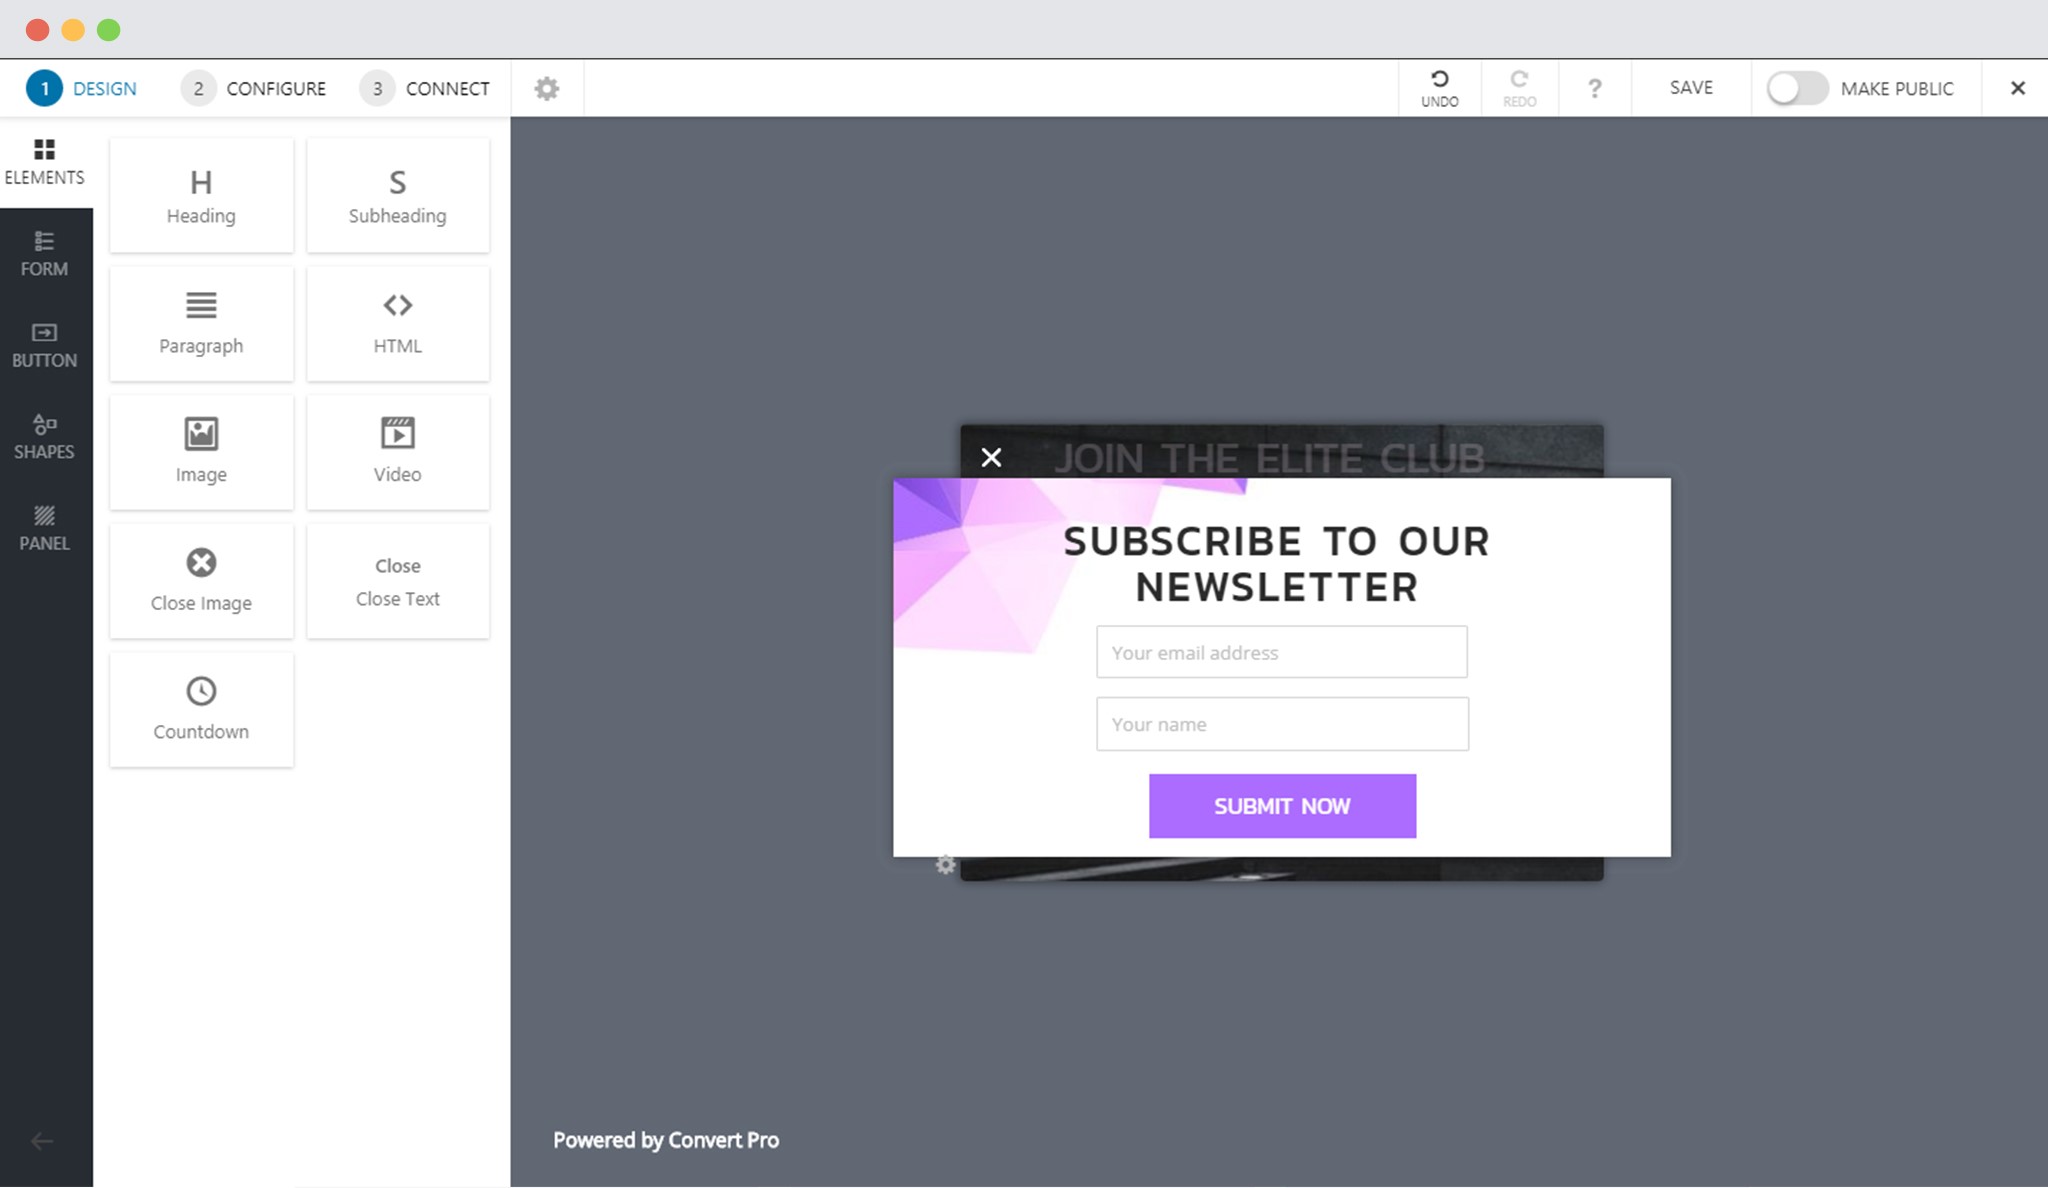
2. Click on the button, open the Action section and choose the button action as “Submit and Go to URL“. You can enter the destination URL in the respective field.
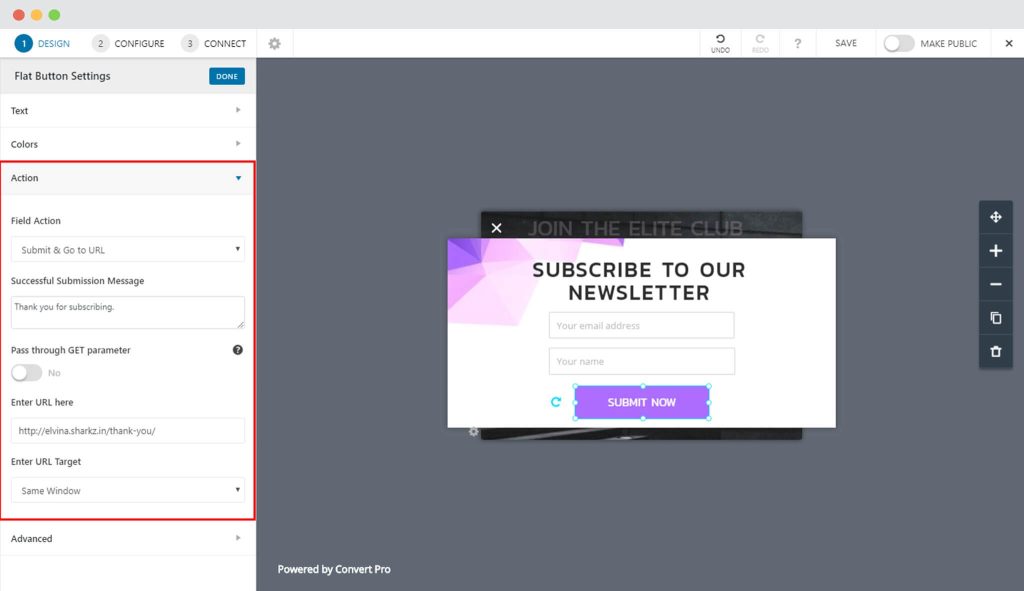
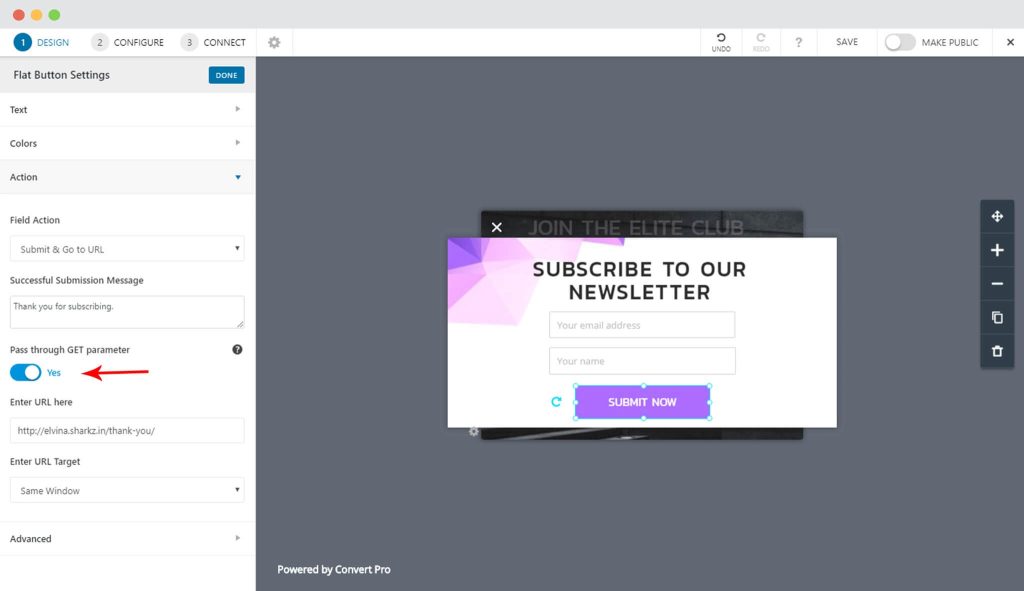
3. Since we want to pass the lead data through Get parameter, enable the “Pass through Get Parameter” option.
These steps above will make sure that the data you obtain through the form and submit using that particular button is passed as parameters in the destination URL.
Now, let us proceed to our Thank you page or the second call-to-action settings.
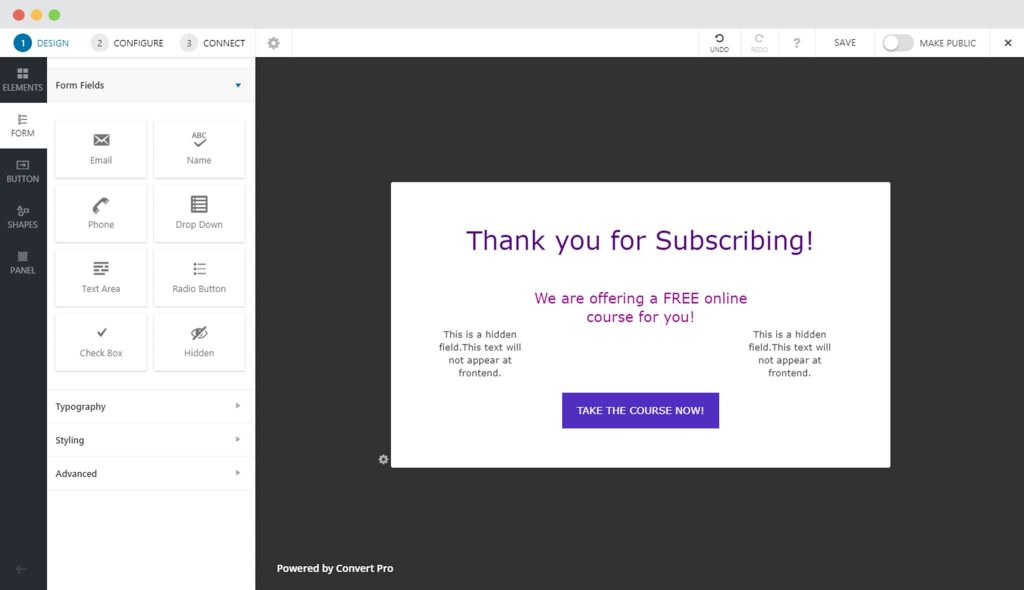
4. Create another call-to-action that will have 2 hidden fields on it and a button. These hidden fields won’t be seen in the front end.
5. Now, we’ll be adding a JavaScript code for this second call-to-action.
This should be added under the “After Call-to-action Open” option as shown in the screenshot below.
Go to Panel -> Advanced JavaScript -> After Call-to-action Open
Here is the code that you need to paste in the section as shown in the screenshot –
var getUrlParameter = function getUrlParameter(sParam) {
var sPageURL = decodeURIComponent(window.location.search.substring(1)),
sURLVariables = sPageURL.split('&'),
sParameterName,
i;for (i = 0; i < sURLVariables.length; i++) {
sParameterName = sURLVariables[i].split('=');if (sParameterName[0] === sParam) {
return sParameterName[1] === undefined ? true : sParameterName[1];
}
}
; var email = getUrlParameter('email');
var name = getUrlParameter('textfield_5121');
jQuery('#cp_hidden_input-1-196 input').val(email);
jQuery('#cp_hidden_input-2-196 input').val(name);
We don't respond to the article feedback, we use it to improve our support content.

